National Instruments LabView
------ LabView Tutorial 1 ------------
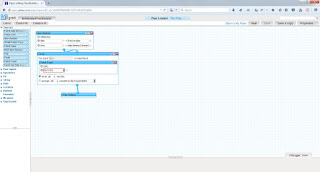
Create Project Window
BlankVI (Virtual Instruments)
- Two windows
Front panel grey one Inputs & Outputs Interface USER
Block Diagram
Run | Run_Continuosly | About | Pause
FONT-F_size
Align Object | Distrubute Objects | Resize | Reorder | Search | Context Help
Debugging tools only in Block Diagram
R-Click on FrontPanel -> Open window Controls
R_click on BlockDiagram -> Opwn Window Functions
Chinche deja la ventana de Controles/Funciones Abierta y separada para maniobrar
Controls Palette -> Numeric -> numeric Control numeric Indicator
Function Palette contains Structures & Functions
Context Help from MEnu or CTRL-H
Form de Palettes can SEARCH by click on upper icon.
When Run a broken diagram show a windows indicating int, DoubleClick on It an shows the error.
Title and size can be changed.
highlight execution shows the data
---- LabView Tutorial 2 -----------
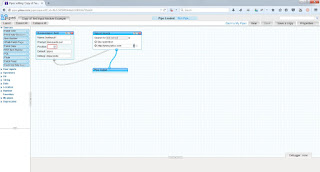
Block diagram functional block of code executing secuencialy
Constants can be added numericals, booleans,... can be edited
Data flow - strictrly flow order of code excecucion, first blocks must be executed before de next bocks are executed
--- LabView Tutorial 3 -------
Parallel procesing - two pieces of code are executing at the same time on the same program
function palette - programmning - structures -> while loop, loop conditional terminal
-------------------------------
Control Panel -> CTLR_E -> Block Diagram
<- <-
CTRL-T Tile the windows
Writing Your First LabVIEW Program
Block Diagram - functional graphical code
running a string constant and a String Indicator
Using the Tools Palette in NI LabVIEW
Tools Palete : View-Tools Palette allows customize de elements in the front panel and block diagram. Also can be set to automatic selection.
LabView Tutorial 1 - Intro to Dataflow Programming (Enable Integration)
● Block Diagram does not execute left to right
● Node executes when data is available to all input terminals
● Node supply data to all output terminals when done
● Parallelism (multiple processors!)
diagram - Diagrama de flujo de programación
LabVIEW Tutorial 2 - Context Help Window (Enable Integration)
Context Help from MEnu or CTRL-H
LabVIEW Tutorial 3 - SubVI Icon and Connector (Enable Integration)
bla bla..
LabVIEW Tutorial 4 - While Loop (Enable Integration)
bla bla..
LabVIEW Tutorial 5 - Shift Register (Enable Integration)
the shift register must be initialized, all of them.
LabVIEW Tutorial 6 - For Loop (Enable Integration)
When using for loop, its important to consider to integrate a timer delay at least of 1ms, other wise the prossesor will be totally focused on destiny the time of the procesor to the task, doing low responsive the front panel.
There are options when right click on the border of the for loop, to manage parallelism
LabVIEW Tutorial 7 - Loop Auto Indexing (Enable Integration)
when put on the border of the for loop auto-indexed tunel appears, this pass values from one for loop to other, in this case are generating aleat numbers and then adding a constant value to each element of the array.
when right click on the border of auto-indexed tunel options appear tunel mode, with last value, indexing, concatenated, conditional.
LabVIEW Tutorial 8 - Creating 2D Arrays (Enable Integration)
Single dimension arrays shows a single line
multiple dimension array shows two lines
Also a multidimentional array can be created with two concatenated for loop structures, using auto-index tunnel.
LabVIEW Tutorial 9 - Waveform Charts (Enable Integration)
With right-Click show a popup window where we can select the Chart History Length, that means the number of points in horizontal axis.
Now we can see how the scroll is realized, this scroll can be ajusted from tree differents modes. Right-Click Advanced->update mode->Strip, Scope , Sweep.
when on the chart, we do right-click, appears
Making visible the graph palette
cursors, zoom, scroll window hand
LabVIEW Tutorial 10 - Waveform Graphs (Enable Integration)
LabVIEW Tutorial 11 - Mechanical Action of Booleans (Enable Integration)
LabVIEW Tutorial 12 - Cluster Controls, Indicators, and Constants (Enable Integration)
Cluster, in the border rigth-click,we have an popup menu
In the context help we get the data of the cluster.
Automatic ordering when addend new elements
Also we have cluster constant, in this case with a numeric constant and a string constant.
LabVIEW Tutorial 13 - Cluster Functions (Enable Integration)
Use bundle and unbundle, also bundle by name and unbundle by name
LabVIEW Tutorial 14 - Case Structures (Enable Integration)
The CASE structure has a SELECTOR LABEL and a CASE SELECTOR terminal. by default create with TRUE FALSE cases.
If we change the Boolean control with a String control, the label selectors change to strings ("true"...). And with the right-click over the border of the case structure we can add a case or set a default case.
Changing to nomeric the control of I32, the value cases can be expressed like 3,4,5 or
3... or ..-1,3.. to match the cases values of the input.
When not defined the output case, it will be 0 for numeris, empty string for string, false for boolean.
LabVIEW Tutorial 15 - Sequence Structure (Enable Integration)
There are two types:
Flat Sequence Structure
Stacked Sequence Structure
This structures gives a secuence of execution fo segments of grafical code, other wise code segments are executed parallely.
Adding a flat sequence structure and with right-click on the border, we can add, remove, merge, insert frames.
Also we can use a stacked sequence structure, were de code segments are stacked secuentialy executed, to share valiables between them, que can create a sequence local, with appear like a yellow scuare where the data can be transfered out this frame to other frame.
LabVIEW Tutorial 16 - Diagram Disable Structure (Enable Integration)
also exist a Conditional Disable Structure.
LabVIEW Tutorial 17 - Property Node (Enable Integration)
string property node.vi example, graph property node.vi example
Over an element, rigth-click ->create->property node and show all the properties that can be used, manipulated of the control.
The next code make visible or not the boolean control with the set visible control.
adding another property node "disabled"
Adding a slide to affect de position left property of the boolean control, The out boolean property node of the loop, is to get the initial position of the control at the start moment.
it was obtained from the front panel directly, not from the already property node existing inside de loop. after was added this property inside the loop.
String Property Node example
Graph Property Node
Create a two array data from signal generators, then build array and add input, to get a 2d array. on properties, ActPlot property set to 0 select the first set of properties that will be manipulated, then again and down the list of properties, do the same with 1 on ActPlot property.
LabVIEW Tutorial 18 - String Functions [Part 1] (Enable Integration)
Here we use de Scan From String function and substring
Format Into String is another string function, that convert multiple input data to string formated
LabVIEW Tutorial 20 - Dialog Functions (Enable Integration)
Starting from Block Diagram we select Dialog Functions, Two Button Dialog.
A simple Dialog flow were ask for exit (it exit anyway), and if the answer is "Yes", shows a second Dialog.
LabVIEW Tutorial 21 - File Paths (Enable Integration)
- Path Data Type
- Path Controls and Constants
- Build paths
- Strip paths
- Converting Strings <-> paths
Select the File Path Control from Contrls->Modern->String & Path->File Path Control.
This is the Control, and with right-click we can adjust extra characteristics...
The executed result is
The Path Control has his own constants...
like Path Constant - any file path
Empty Path - to build a new path from zero...
Not A Path Constant - to return a <Not a Path> from any structure or subVI result where not a valid file path is required.
Not A RefNum Constant - to return from a structure or subVI like an error..
Current VI path - not need explain.
Library VI path - not need explain.
This is an example of strip path and build path.
In this exercise, we initialize the value property by property node method, the File Path Control, including inside a while loop, and then open and close the file. look at the error out indicators.
An example of the use of conversions between path<->string, path<->array of strings.
LabVIEW Tutorial 22 - Text Files (Enable Integration)
- Writing a text to a text file
- Writing by path vs. writing by file references.
- Reading from text files.
The easiest way to write to a file, is like showing next.
we used the control File IO -> Write Text File which do all the work, it opens a dialog asking for the file name, and write to it.
These are util controls (some) and File Constants:
In this case we use a Path Control to asign the path to the Open File Control, it can be canceled, if this is the case just pass the Case Structure with TRUE, and the error out is permeated, else if not canceled, the refnum is passed to the Write Text File Control that do the job, and then Close de File whit Close File control.
The example of Read from Text File is as shown below, is the same lake the previous example, with some changes.
LabVIEW Tutorial 23 - Format to File, Scan from File (Enable Integration)
We can refer from the example integrated with the software, Format Into File and Scan From File.vi, but we create new one and taste the way of do it. Basicaly it join diferent type of data and write to a file, to then read this. The data string passed to the Format to File has not to have spaces, because it will be considered as other field data.
The result is a data formated as the String format says, if the Format String is omited then the data will be writed simple separated by space.
LabVIEW Tutorial 24 - Spreadsheet Files (Enable Integration)
The simples way to use the control is like follow
To Read the file easy
LabVIEW Tutorial 25 - Customizing VI Properties (Enable Integration)
From File->VI Properties we get:
Some Dialogs from the categories.
LabVIEW Tutorial 26 - Key Navigation (Enable Integration)
We can Focus an element, like button, selecting a key or his combination with Shift, Control key, also can skip the focus when Tab change focus.
LabVIEW Tutorial 27 - Event Driven Programming (Enable Integration)
bla
FREE LabView Training CLD Preparation Exam
www.youtube.com
---- CLD Exam Graing Criteria -----
Functionality 15 37.5%
Style 15 37.5%
Documentation 10 25%
sum 40 100%
-----------------------------------
pass grade => 75%
What skills does a CLD demostarte?
-Problem Solving skills
-LabView competency
-Modular, scalable, and maintainable application design experince
-consistent documentation
-Moderate development (wiring) speed
-Debbuging and testing
CLD Exam Theme Scenario - Sequencer
program design should be scalable to adapt to additional steps
FRONT PANEL
csv or ini file start (setup or start)
step 2,10,2
step 3,4,3
step 1,6,5
Secuencer Setup
|0 Step Selector Step2 V Mode
Timing 10 Continuous Run
Wait 2 Single Run
Step Selector Step3 V
Timing 4
Wait 3
Step Selector Step1 V
Timing 6
Wait 5
Block Diagram ----------------------------
V |
Step 1 |
Execute: x secs |
| wait for m secs |
V |
start ----> Step 2 wait for k secs
Execute: x secs ^
| wait for n secs |
V |
Step 3 |
Execute: x secs ----------------
CLD Exam Theme - Summary
- Exams are based on a sequencer type applications
- Step order is configurable via an input file or user interface
- Timing is an essential aspect of the application
- Output or log file may be required
- Application must respond to user interface activity within 100msec.
CLD Exam Design
1. Design Patterns
2. Timing Methods
3. Development Style
4. Documentation
5. Error Handling
Design Patterns for CLD Applications
Design pattern Advantages Disadvantages
State Machine Handles Sequence Control Cannot handle storing of sequences
May not be responsive enough to user
interface events
Queue based user -Extends state machine to -Does not allow intensive event or
interface event store sequences sequence processing
Handler -Handles user interface -User interface events need to be
events controlled by limiting access to front
panel controls
Producer/Consumer -Responsive to user - Does not integrate non-user interface
with events interface events events well
- Allows intensive event and
sequence processing
=========================================


