Java IntelliJ Simple Gradle Project


reference IntelliJ web page.
https://github.com/jalbertomr/simpleGradleProject
Steps to follow
1 .- Create a Simple Gradle Project. with Junit.
2 .- Add Simple Java Code, and Tests.
3 .- Run application with Gradle.
4 .- Run Tests
5 .- Create Executable JAR file
6 .- Run the JAR file with Gradle.
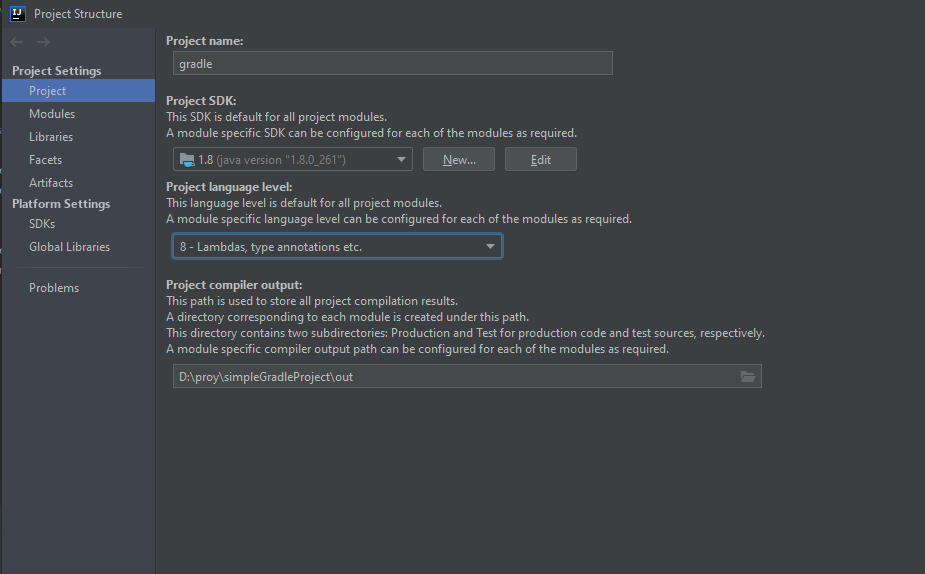
1 .- Create a Simple Gradle Project. with Junit.
.Create a New Project of type Gradle with Java.


2 .- Add Simple Java Code, and Tests.
package com.gradle.tutorial;

public class NumberProcessor {
    public static void main(String[] args) {
        for (int i = 1;  i < 100; i++){
            System.out.println( convert(i));
        }
    }

    public static String convert(int numberProcessor) {
        if ( numberProcessor % 15 == 0) {
            return "tresYcinco";
        }
        if ( numberProcessor % 3 == 0) {
            return "tres";
        }
        if ( numberProcessor % 5 == 0) {
            return "cinco";
        }
        return String.valueOf(numberProcessor);
    }
}
Create his Test class
Put the cursor over class NumberProcessor and then type Ctrl+Shift+T, and code the test.
package com.gradle.tutorial;

import org.junit.Assert;
import org.junit.Test;

public class NumberProcessorTest {
    @Test
    public void NumberNormalNumbers() {
        NumberProcessor np = new NumberProcessor();
        Assert.assertEquals("1", np.convert(1));
        Assert.assertEquals("2", np.convert(2));
    }

    @Test
    public void NumberTres() {
        NumberProcessor np = new NumberProcessor();
        Assert.assertEquals("tres", np.convert(3));
    }

    @Test
    public void NumberCinco() {
        NumberProcessor np = new NumberProcessor();
        Assert.assertEquals("cinco", np.convert(5));
    }

    @Test
    public void NumberTresYCinco(){
        NumberProcessor np = new NumberProcessor();
        Assert.assertEquals("tresYcinco", np.convert(15));
    }

}
3 .- Run application with Gradle.

11:31:16 a. m.: Executing task 'NumberProcessor.main()'...
> Task :compileJava
> Task :processResources NO-SOURCE
> Task :classes
> Task :NumberProcessor.main()
1
2
tres
4
cinco
tres
7
8
tres
cinco
11
tres
13
14
tresYcinco
4 .- Run Tests
On the file of Test NumberProcessorTest.java, we can run individual test, putting the cursor over the function test and run the test.

The output of the Test is OK.

Now lets alter the Test to get a Fail output, just to see.

5 .- Create Executable JAR file
In the Gradle Tool Window, in the Tasks node, and select build task to run it.
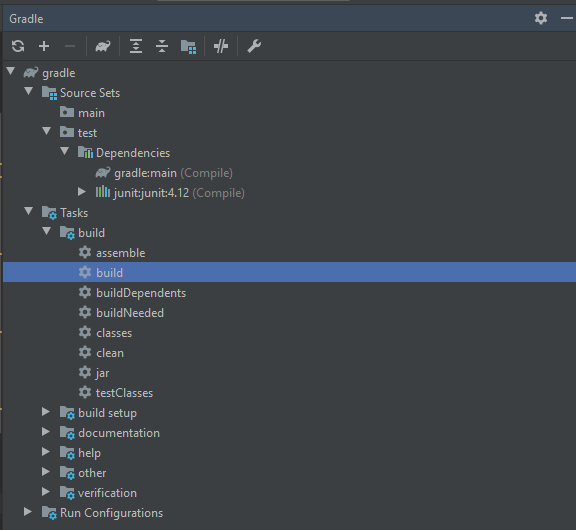
Once build the project, in the project window is generated the jar file on build -> libs

Run the program with java -jar
D:\proy\simpleGradleProject>java -jar build\libs\gradle-1.0-SNAPSHOT.jarno main manifest attribute, in build\libs\gradle-1.0-SNAPSHOT.jar
We get an error, about main manifest attribute, we have to adjust the gradle file. and add the folowing lines.
jar {
    manifest {
        attributes "Main-Class": "com.gradle.tutorial.NumberProcessor"
    }
    from {
        configurations.compile.collect { it.isDirectory() ?  it : zipTree(it) }
    }
}
Rebuid the project and run it again.
1
2
tres
4
cinco
6 .- Run the JAR file with Gradle.
Add the following lines to the gradle.file
plugins {
    id 'java'
    id 'application'
}
and
application {
    mainClassName = 'com.gradle.tutorial.NumberProcessor'
}
It creates in Gradle Tool windows the node Task -> application -> run.
and in the Project Window creates build -> distribution node.

And its done.
eot